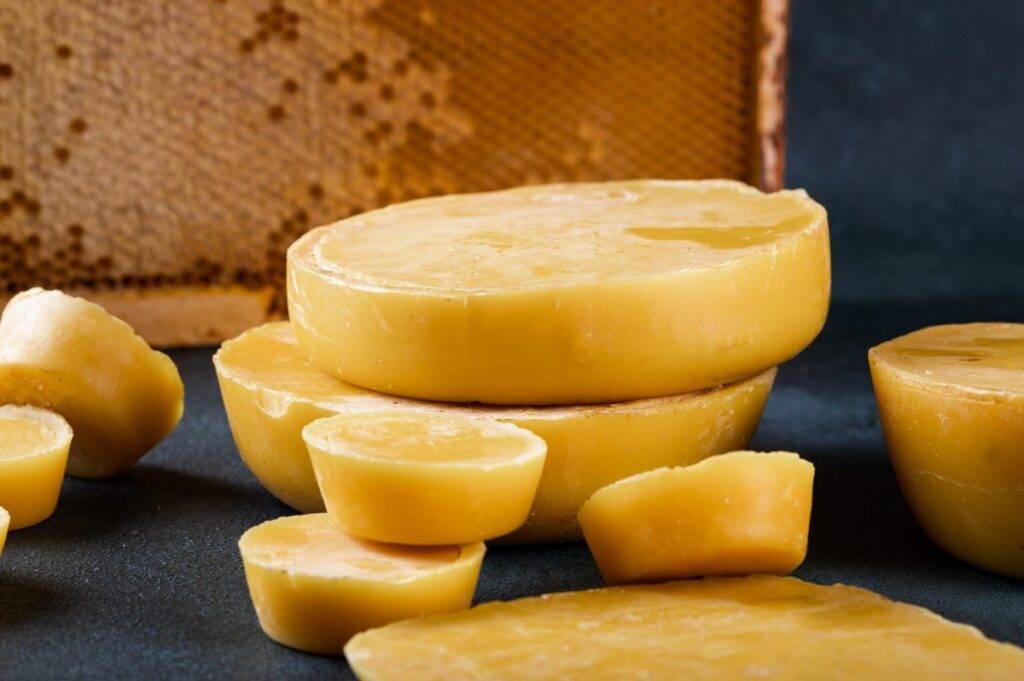
Many people think that melting and purifying beeswax is a headache – we’ll debunk this myth in a few easy steps.
Now that you have beeswax, there are some important steps you need to take before proceeding and using it further. We’ll look at how to melt and purify beeswax in two different ways before using it.
Why Melt and Purify Beeswax?
Purification of beeswax through a melting and purification process may be referred to as refined beeswax. Learning how to melt and purify beeswax before using it is important for a number of reasons.
- Beeswax is usually collected by bees in an outdoor setting and is therefore susceptible to some dirt particles or even dead bees. While these are natural products of the environment, they reduce the purity and smooth texture of beeswax.
- After the honey is extracted, through proper melting and purification methods, smooth, pure beeswax can be produced for use.

Melt beeswax
The first step in cleaning beeswax is to melt it. One way is a solar oven. However, not everyone has a solar oven in their home or garage.
However, we need to heat the wax to its melting point, which is between 144 and 147 degrees Fahrenheit.
To get around this, there are two alternatives to melting beeswax that can be assembled almost anywhere.
These gifts are:
- Double boiler
- Crockpot Water Bath
Double boiler
A double boiler method is a valuable way to melt your beeswax.
- Gather a large pot and a small metal bowl that sits comfortably on top. Make sure you use metal bowls that you don’t need to eat later or use for food preparation as beeswax is difficult to remove
- Fill the bottom pot halfway with water
- Bring the water to a boil, and then place the metal bowl on top
- Now reduce the heat and bring the water to a boil
- You can now place your beeswax in a metal bowl and watch it slowly melt. This takes at least 15 minutes
If you plan to clean the wax next or use a different molding method, we strongly recommend that you prepare the cheesecloth filter system before the wax hardens again.
It is very important not to let the water touch the wax as this will destroy the natural texture. It also ensures that no direct heat source comes into contact with your wax. This can burn you and damage your wax.
Crockpot Water Bath
Besides being useful in cooking, crock pots are also a great tool for melting beeswax.
- Get a large clay pot and a smaller metal bowl or pitcher that fits easily in a bowl. This will hold your beeswax, so make sure it’s not a dish you plan to use as food later.
- Fill the crock pot halfway, but make sure the water doesn’t spill over the top of the metal bowl/pot into the wax.
- Bring the water to a boil and put the metal bowl in it.
- Carefully pour the wax into a metal bowl or jar, taking care not to contaminate the wax with the water. It starts to melt slowly.
By using this melting method, you have separated clean beeswax from the dirt. If you carefully remove the bowl from the pot, you will find a plate of clean beeswax on it, and the dirty beeswax has sunk to the bottom.
After either melting method, you can further purify your beeswax using a gauze filter.
Cleaning beeswax
Once melted, this once-solid beeswax is easier to clean up in its liquid state, allowing us to work with it further than solid beeswax.
Although beeswax has many antibacterial properties, some bacteria may still be present in it until it is cleaned. Bacteria that may be present in the wax would have been destroyed by the high melting temperature.
Now is the time to clean any solid contaminants from the beeswax. There are two ways:
- Temperature method
- Gauze filter
Temperature method
The first way to clean beeswax is to repeat the same method as melting beeswax. Melting the wax also helps separate impurities from pure wax.
You may have noticed that the clean beeswax forms a sort of disc on the top of your bowl with some “dirty” residue on the bottom. Just repeat one of your smelting operations and collect clean slices from above.
Gauze filter
Another technique for cleaning melted beeswax is a filter system. Filtration is done with cheesecloth.
By using a fine screening system, you can remove every ounce of contamination in your beautiful beeswax. Not only will your wax be smoother and softer, it’s also of higher quality
Simple steps are:
- Gather your cheesecloth and a tall pitcher or large storage container into which the beeswax will flow. Ideally, this is where you want to store beeswax when you need it.
- Place the cheesecloth tightly over the storage container and secure by tying string around the edges and around the container or with a rubber band.
- Once the wax has melted, pour it slowly onto the cheesecloth following the steps above.
- The clean wax drips slowly over the cheesecloth, leaving impurities on the cloth.
- If you’re cleaning a lot of beeswax, it’s best to do it in small batches to prevent the wax from cooling and solidifying as it drips over the cheesecloth.
What’s next?
Cleaning beeswax has a variety of uses in the medical and cosmetic industries. It can also be used to make natural candles as well as sustainable alternatives to plastic, e.g. beeswax foil.
Melting and cleaning your beeswax is certainly not as complicated as it looks! Almost anyone can do this anywhere. Choose your melting method, and then use the temperature method or cheesecloth filtration to purify the beeswax. The world is your hive!

